
Most photographers know these two terms. But very few understand when and why to actually use each one. Soft light vs hard light in studio photography is not just a technical choice. It is a creative decision that shapes how your subject looks and how your viewer feels.
The light you choose changes everything. It affects skin texture, product detail, shadow depth, and the overall mood of your image. So before you touch a modifier, it helps to understand what each type of light actually does.
The Real Difference Between Hard Light and Soft Light
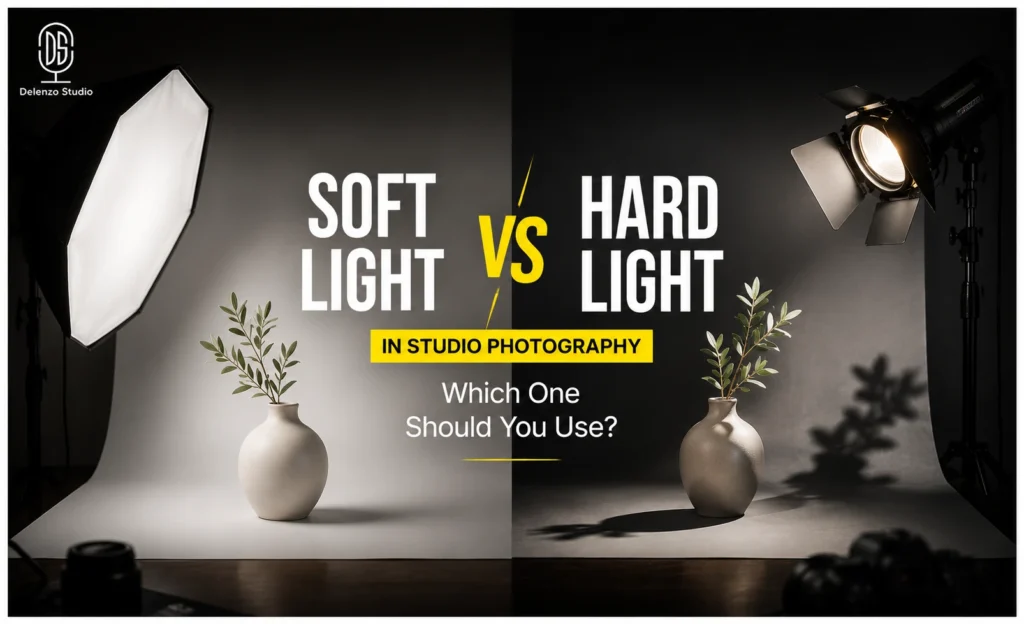
The difference comes down to one thing: the size of the light source relative to your subject.
A large light source placed close to your subject produces soft light portrait photography. The light wraps around the subject. Shadows have soft, gradual edges. The transition from light to dark is smooth.
A small or distant light source produces hard light studio photography. The light hits the subject directly. Shadows are sharp and defined. The contrast is strong and immediate.
Think of the sun on a clear day. It creates hard, defined shadows because it appears as a small point in the sky. Now think of an overcast day. The clouds diffuse the light across the entire sky. That is the same light, but suddenly it is soft and even. Studio lighting works the same way.
Below is a quick side-by-side comparison to make the difference even clearer:
| Factor | Soft Light | Hard Light |
| Light source size | Large relative to subject | Small relative to subject |
| Shadow edges | Gradual and blended | Sharp and defined |
| Skin texture | Smoothed and flattering | Prominent and detailed |
| Contrast | Low to medium | High |
| Mood | Natural, gentle, clean | Dramatic, bold, editorial |
| Best for | Portraits, brand shoots | Fashion, products, creative |
How to Recognize Hard Light and Soft Light in a Photo
You can train your eye to spot the difference in seconds. The shadow edges tell you everything. Hard light leaves sharp, defined lines. Soft light leaves gradual, blended transitions. Once you know what to look for, you can read any photo instantly.
Identifying Hard Light
Hard light creates sharp shadow edges with very little transition between light and dark areas.
- The shadow under someone’s nose appears as a clean, defined line
- The shadow cast by a chin onto the neck has a hard, precise edge
- Skin texture, pores, and imperfections become more visible
- The image often feels dramatic or high-contrast
- Highlights are bright and transition into shadow quickly
Identifying Soft Light
Soft light creates shadows that fade gradually. The edge between lit and unlit areas is wide and blended.
- Skin looks smoother and more even across the frame
- Shadow edges are wide and transition slowly into the lit areas
- The overall image feels more flattering and natural
- Fine lines and skin texture are less pronounced
- Popular choice for soft light portrait photography, brand shoots, and portrait sessions
How to Create Soft Light in the Studio
There are several reliable ways to produce soft, flattering light in a studio environment. The modifier you choose shapes the quality, direction, and spread of your light. Each option in this light modifier guide gives you a slightly different result.
Large Softbox Close to the Subject
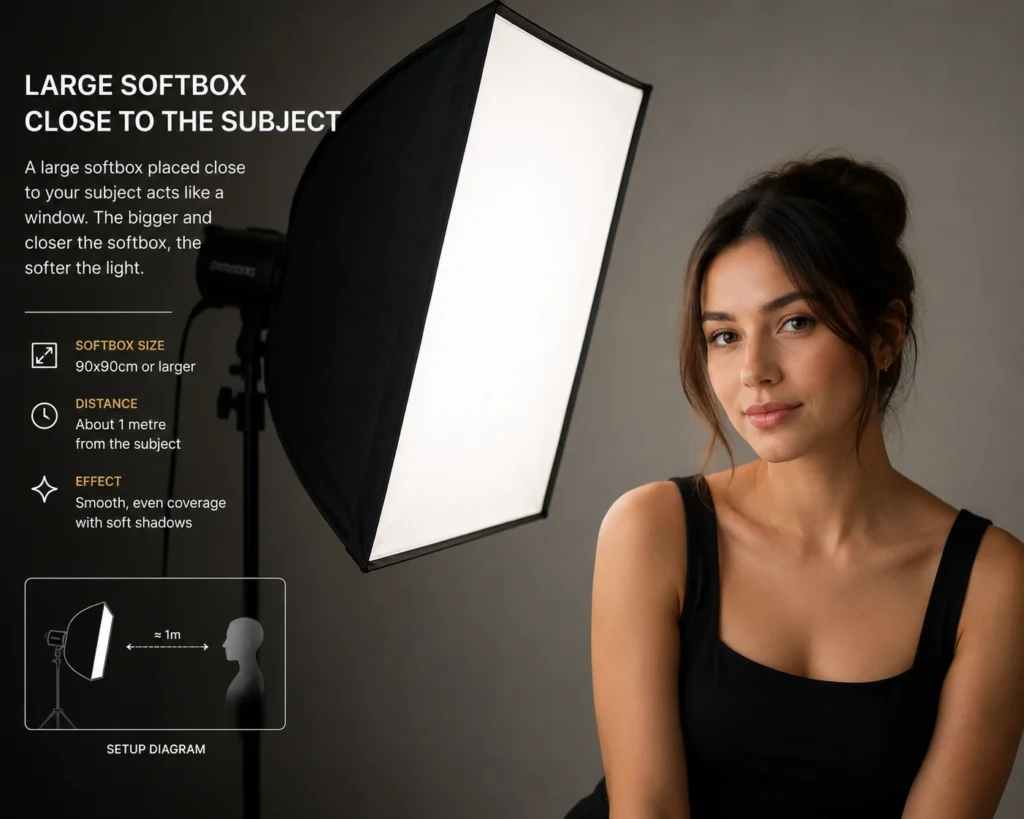
This is one of the most common tools for creating soft light studio setups. A large softbox placed close to your subject acts like a window. The bigger and closer the softbox, the softer the light. A 90x90cm or larger softbox at about one metre from your subject gives you smooth, even coverage. This is ideal for studio lighting for portraits and skin-focused work.
Umbrella
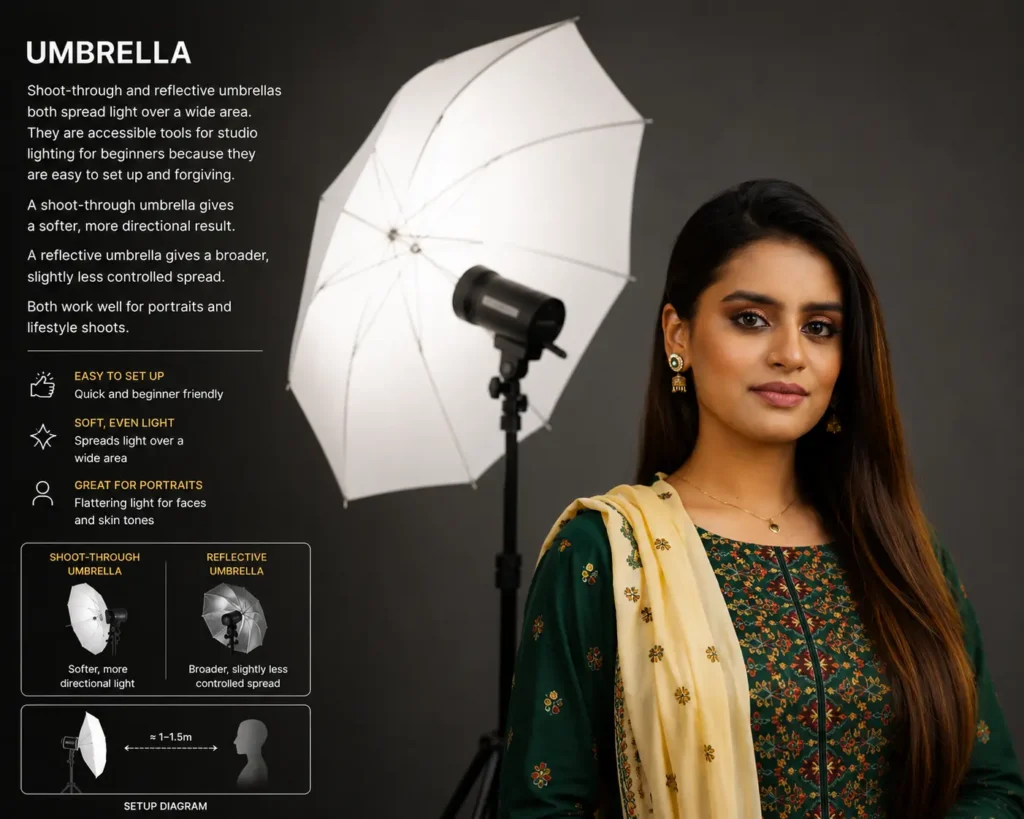
Shoot-through and reflective umbrellas both spread light over a wide area. They are accessible tools for studio lighting for beginners because they are easy to set up and forgiving. A shoot-through umbrella gives a softer, more directional result. A reflective umbrella gives a broader, slightly less controlled spread. Both work well for portraits and lifestyle shoots.
Ceiling or Wall Bounce
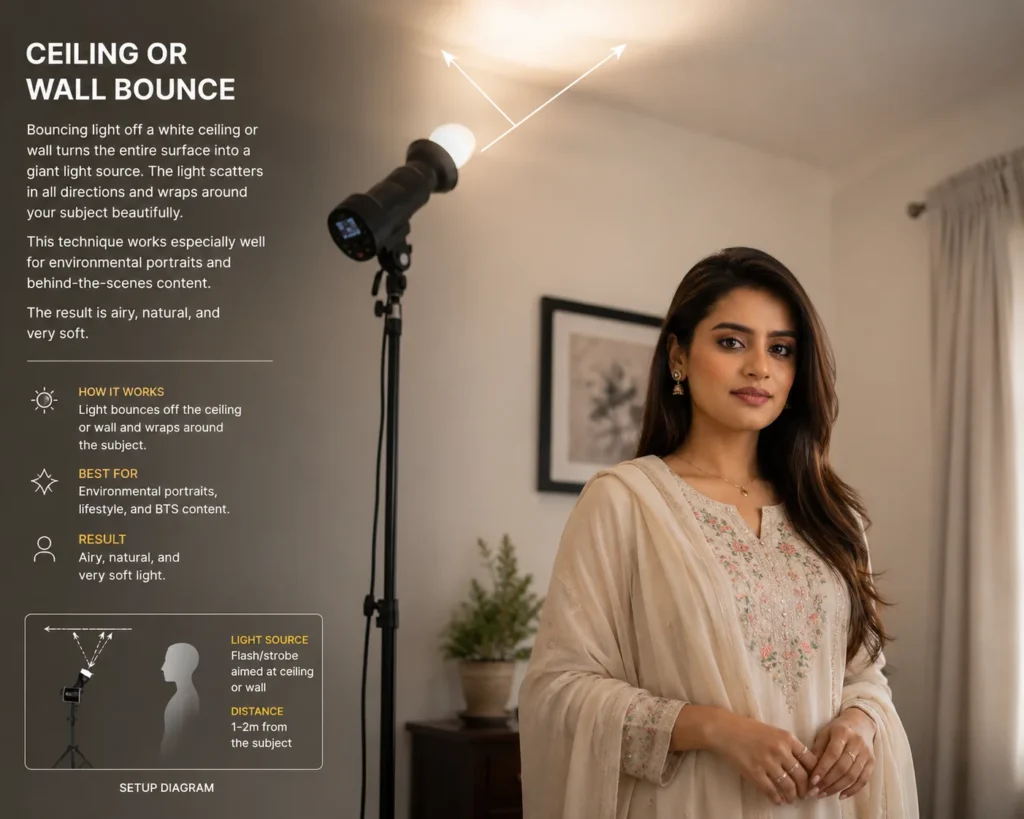
Bouncing light off a white ceiling or wall turns the entire surface into a giant light source. The light scatters in all directions and wraps around your subject beautifully. This technique works especially well for environmental portraits and behind-the-scenes content. The result is airy, natural, and very soft.
Window Light
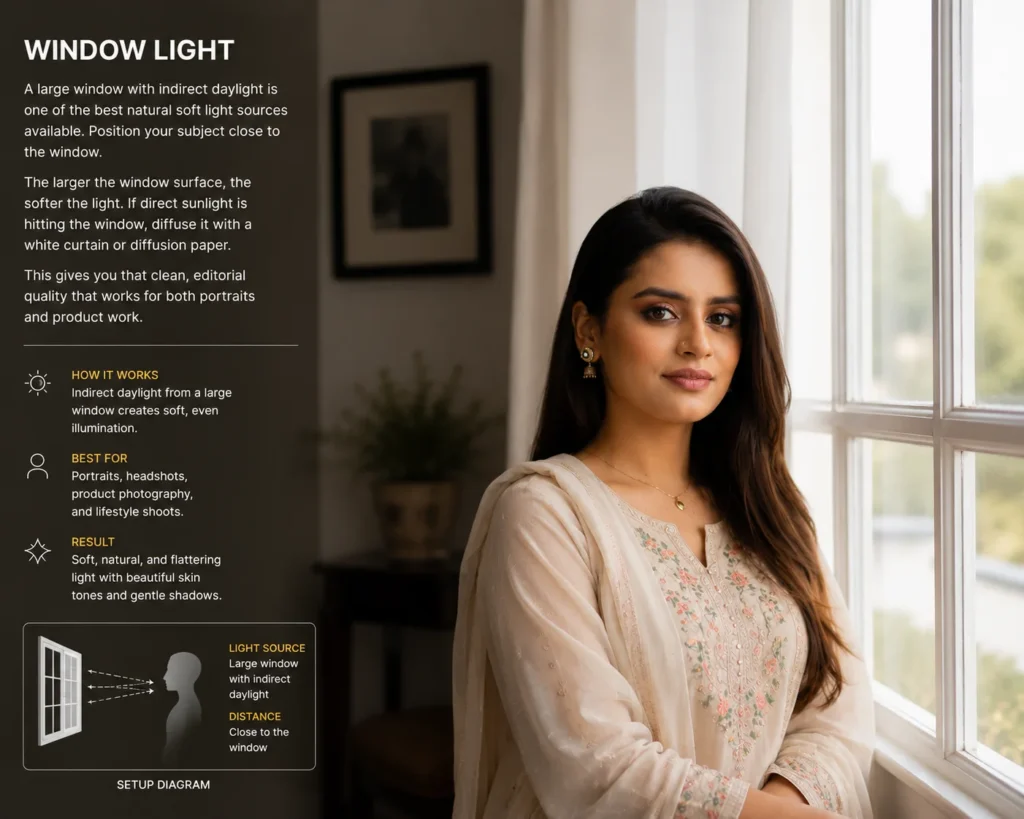
A large window with indirect daylight is one of the best natural soft light sources available. Position your subject close to the window. The larger the window surface, the softer the light. If direct sunlight is hitting the window, diffuse it with a white curtain or diffusion paper. This gives you that clean, editorial quality that works for both portraits and product work.
How to Create Hard Light in the Studio
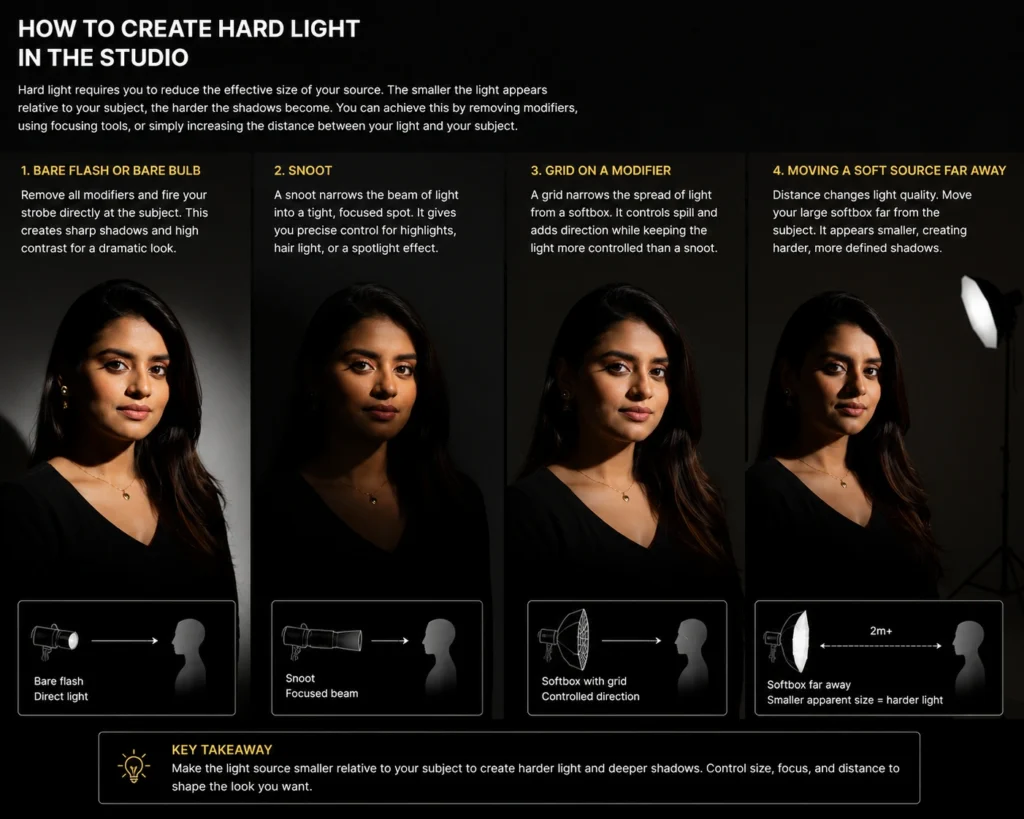
Hard light requires you to reduce the effective size of your source. The smaller the light appears relative to your subject, the harder the shadows become. You can achieve this by removing modifiers, using focusing tools, or simply increasing the distance between your light and your subject. Here is how hard light studio photography setups typically work.
Bare Flash or Bare Bulb
Remove all modifiers and fire your strobe directly at the subject. This is the simplest form of hard light. The flash head is small relative to the subject, so shadows are sharp and contrast is high. It works well for dramatic editorial portraits and creative work where impact matters more than flattery.
Snoot
A snoot is a tube that narrows the beam of light into a tight, focused spot. It gives you very precise placement of a small, hard light patch. Snoots are useful for adding a specific highlight, lighting hair separately, or creating a spotlight effect on part of your subject.
Grid on a Modifier
A grid narrows the spread of light from a softbox or reflector. It controls spill and gives the light more direction without making it as extreme as a snoot. If you are weighing softbox vs hard light results, a grid sits comfortably in between. The shadows stay defined, but the light itself is slightly more controlled than a bare flash.
Moving a Soft Source Far Away
Distance changes light quality. Move your large softbox to the other side of the room. It now appears small relative to your subject. The same modifier that gave you beautiful soft light now produces harder, more defined shadows. This is a simple technique that needs no additional equipment.
Combining Hard and Soft Light — The Advanced Setup
The most interesting studio photography tips come from combining both light types. Very few real-world shoots use only one. Here are three practical setups that work well in professional environments.
Portrait with Soft Key and Hard Backlight
- Use a large softbox as your main light on the face
- Add a hard grid or bare flash pointing at the hair or background from behind
- The face looks flattering and smooth
- The rim or background detail stays sharp and dramatic
- This separation adds depth and dimension to the image
Best for: Portraits, headshots, personal branding
Product Photography with Hard Accent and Soft Fill
- Use a soft fill light to reduce harsh shadows across the base of the product
- Add a hard accent light from the side or behind to catch the edges
- This technique reveals texture and shape clearly
- It makes products look more premium and three-dimensional
Best for: Product photography, ecommerce, commercial shoots
Fashion Portrait with Hard Key and Soft Secondary
- Lead with a direct hard light for strong shadow and bone structure
- Add a secondary soft fill from the opposite side
- This opens up the shadows just enough without losing the drama
- You keep the impact but retain detail in the shadow areas
Best for: Editorial, fashion, high-contrast creative work
Want to see these techniques in action? This video walks through practical lighting tips and techniques applied in a real studio environment: Watch: Lighting Tips and Technique for Photography
Common Mistakes When Using Studio Lighting
Even experienced photographers repeat these mistakes. Knowing them helps you avoid wasted time on set.
- Placing the softbox too far away. Distance reduces softness fast. Keep your softbox close unless you specifically want harder light.
- Using soft light for every product shoot. Some products need hard, direct light to reveal texture and edge detail. Soft light can flatten them and remove the definition that makes them look premium.
- Ignoring shadow placement. Where your shadow falls matters as much as light quality. Check your shadows before you shoot, not after.
- Mixing colour temperatures. Warm and cool sources fight each other on camera. Match your colour temperature across all lights on set.
- Assuming one light is always enough. A single source rarely gives you full control. Even a simple reflector as a second source improves most setups significantly.
Lighting at Delenzo Studio — What You Get in Practice
At Delenzo Studio photography space in Gulberg, Lahore, the setup is built to handle both light types properly. The studio runs professional studio lighting setups with adjustable output, clean softbox configurations, and a controlled shooting environment. Cameras used include the Sigma BF and Sony, paired with premium Sigma lenses for sharp, accurate results.
This matters in practice. Many photographers in Lahore work with whatever light is available. But making proper soft light vs hard light in studio photography decisions requires the right gear to execute them well. Controlled strobe output, quality diffusion, and a purpose-built space make those decisions possible on every shoot.
The team at Delenzo Studio understands both lighting styles and can guide you through setups based on your specific goals. Whether you are a brand shooting product content or a creator building a portfolio, the studio is set up to support the result you are after.
Conclusion
Neither soft light nor hard light is better. They serve different purposes and tell different stories. Soft light flatters faces and works beautifully for portraits, lifestyle content, and clean brand imagery. Hard light adds drama, reveals texture, and creates impact.
The skill is knowing which one to reach for based on what the image needs to communicate. Start with the basics, practice one setup at a time, and pay close attention to your shadow edges. That feedback loop will teach you more than any single rule.
When you are ready to shoot in a space that supports both approaches professionally, Delenzo Studio in Lahore is a solid option to consider.
Frequently Asked Questions
Soft light produces gradual shadow edges and even tones. Hard light creates sharp shadow edges and high contrast. The difference comes from the size of the light source relative to your subject.
Use soft light in portrait photography for flattering, smooth skin tones. Use hard light when you want drama, strong contrast, or editorial impact. The subject and mood of the shoot should guide your choice.
Not always. A diffuser softens light only if it is large enough relative to your subject. A small diffuser placed far away still produces hard light. Size and distance both determine the final result.
The best product photography lighting in a studio is a combination of soft and hard light. Use soft light to fill shadows evenly across the base. Add a hard accent light to reveal edges, texture, and shape.
Distance directly controls light quality. Moving a light source further away makes it appear smaller relative to your subject, producing harder shadows and higher contrast. Closer placement makes the source appear larger, creating softer, more gradual shadow edges.