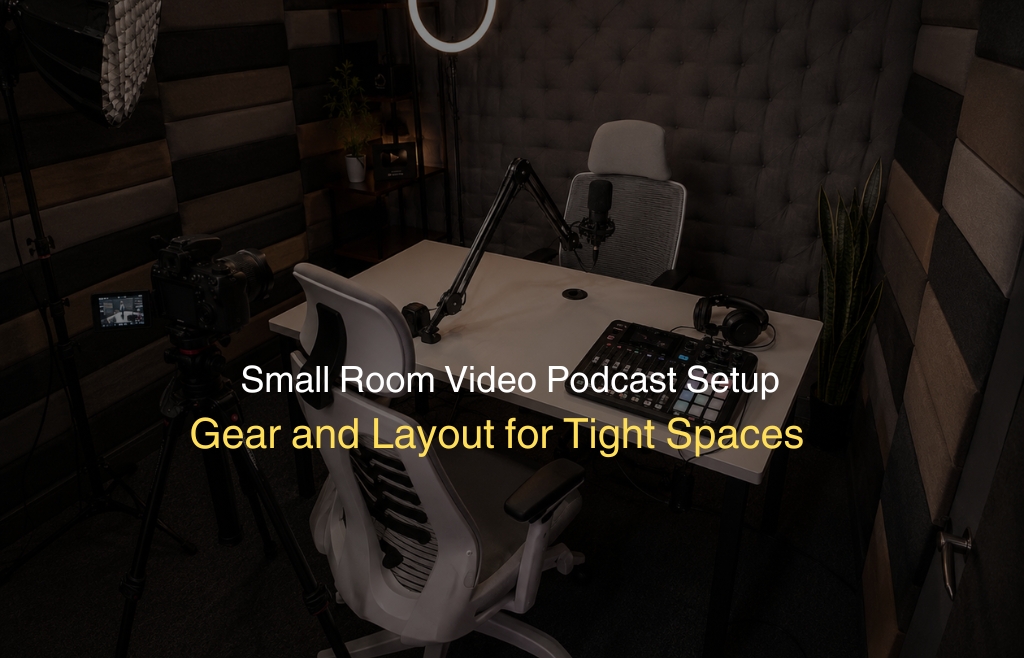
Most people assume you need a big studio to record a great video podcast. That is not true. A spare bedroom, a home office corner, or even a walk-in wardrobe can produce studio-quality results. You just need the right approach. This guide walks you through a complete small room video podcast setup from choosing your space to laying out your gear. Every step is practical and easy to follow. Whether you are a solo creator or a brand just starting out, this is exactly what you need to get recording.
Understanding What “Small Room” Means for Podcast Video
A small room is typically anything under 150 square feet. Think of a box room, a home office, or a converted storage space.
Small rooms create two main challenges for video podcasting. First, sound bounces off hard walls and creates echo. Second, there is limited space for gear, movement, and good framing.
But here is the good news. Small rooms also have advantages. They warm up faster acoustically. They are easier to soundproof. And they feel more intimate on camera. Once you understand how your room behaves with sound and light, everything else falls into place naturally.
Step 1 — Room Selection and Positioning
Before buying a single piece of gear, choose the right room and position within that room. Not every small room is equal. Some have too many hard surfaces. Others face noisy streets. The room you pick sets the foundation for your entire setup.
Choosing the Best Small Room in Your Home or Office
Start by walking through your available spaces. Listen carefully to each one. Clap your hands once and hear how long the echo lasts.
Rooms with carpet, heavy curtains, or soft furnishings absorb sound naturally. These are your best candidates.
Avoid rooms with bare concrete walls, tiled floors, or large glass windows. These reflect sound and create harshness in recordings.
Closets are often overlooked but work brilliantly. Clothes hanging around you act as natural acoustic panels.
Position yourself away from windows. Natural light behind you blows out your background on camera. Face the window or place it to your side instead.
Corners of rooms tend to build up low-frequency sound. Avoid sitting directly in front of or in a corner when possible.
Step 2 — Acoustic Treatment for Small Rooms
This is the step most beginners skip. Then they wonder why their recordings sound hollow or echoey. Acoustic treatment does not have to be expensive. Even basic changes make a dramatic difference in a small space.
Start with soft surfaces. Add a thick rug under your desk. Hang a heavy curtain or blanket behind your camera position.
Place foam panels or acoustic tiles on the two side walls closest to your microphone. These absorb direct reflections most effectively.
A bookshelf filled with books behind you works as a diffuser. It scatters sound waves and reduces harsh echoes.
If your ceiling is bare, hang a moving blanket or an acoustic panel above your recording position. Ceiling reflections are often ignored and cause real problems.
Soundproofing vs Acoustic Treatment — Know the Difference
These two terms get mixed up constantly. They solve very different problems.
Acoustic treatment controls sound inside your room. It reduces echo, reverb, and reflection. Foam panels and rugs do this.
Soundproofing blocks sound from entering or leaving your room. It requires mass, like thick walls, door seals, and double-pane windows.
For most home podcasters, acoustic treatment is the priority. True soundproofing requires construction work.
A door draft stopper and a thick rug can reduce outside noise significantly without any renovation work.
Step 3 — Compact Gear Selection for Small Spaces
Gear selection in a small room is about function and footprint. Every item needs to earn its space on your desk.
The good news is that compact podcast gear has improved massively in recent years. You can get professional results from surprisingly small setups.
Boom Arms vs Desk Stands in Small Rooms
Desk stands take up surface space. In a small room where every inch counts, that matters.
A boom arm mounts to the edge of your desk and swings out of the way when not recording. This keeps your workspace clear and reduces vibration noise from your desk.
If your desk is very narrow or against a wall, a short-arm boom works better than a full-length one. Brands like Rode and Elgato make excellent compact options.
For a minimal desk stand option, use a small tabletop shock mount with a low-profile base. This works well for solo setups where the desk has room.
Microphones for Small Room Video Podcasts
In a small room, microphone choice directly affects your recording quality. Room acoustics are less forgiving here.
A dynamic microphone is the better choice for untreated or partially treated small rooms. Dynamic mics reject background noise and room reflections more effectively than condensers.
The Shure SM7B and Audio-Technica AT2020 are popular choices. Both deliver warm, clean audio even in imperfect acoustic conditions.
If your room is well-treated and quiet, a cardioid condenser like the Rode NT1 can produce excellent results too.
Keep your microphone close to your mouth around 6 to 8 inches. This reduces room pickup and improves voice clarity naturally.
Cameras for Small Room Video Podcasts
In a tight space, a large camera on a full tripod is impractical. You need something compact and flexible.
A mirrorless camera like the Sigma BF or Sony A7III mounted on a small desk arm or a mini tripod works very well. They offer excellent image quality in low light.
A webcam-style camera like the Logitech Brio 4K is a simpler option for beginners. It requires no configuration and delivers clean 4K footage.
For small rooms, a slightly wider lens helps. It gives you more of the background frame without needing to sit far from the camera.
A 16mm or 24mm lens equivalent on a crop sensor works very well for close desk-based recording positions.
Lighting for Small Rooms
Lighting in a small room requires a different approach compared to a large studio.
A large softbox light can be too powerful and too physically bulky in a tight space. Opt for a compact key light instead.
The Elgato Key Light Air or an equivalent small LED panel mounts directly to your desk or monitor. It takes up almost no floor space.
Place your key light at roughly a 45-degree angle to your face. This creates depth and avoids flat, unflattering illumination.
A small fill light or a reflector on the opposite side softens harsh shadows. Even a white foam board works as a DIY reflector.
Avoid overhead room lights during recording. They cast shadows under your eyes and flatten your face on camera.
If your room has a window, use it wisely. Soft, diffused daylight from a window to your side is often the best light source available.
Audio Interface for Small Room Multi-Mic Setups
If you record with more than one microphone, you need an audio interface. This connects your mics to your computer and controls input levels.
The Focusrite Scarlett 2i2 is the most popular two-channel interface. It is compact, reliable, and produces excellent audio quality for the price.
For two hosts in a small room, the Rode Caster Pro II is a strong all-in-one option. It handles mixing, monitoring, and sound effects in one unit.
Place your interface on your desk within easy reach. Keep it close to avoid long cable runs cluttering your small space.
Step 4 — Small Room Layout Configurations
A thoughtful small podcast studio layout makes the difference between a cramped, chaotic setup and a clean, professional one.
The way you arrange your furniture, gear, and camera angle directly affects how your video looks and how your audio sounds.
Solo Video Podcast Setup (Small Room)
Setting up a solo space correctly makes everything else easier. Here is exactly how to arrange your room for the best results.
- Desk position: Push your desk against a wall and face outward into the room. This gives your camera more depth to work with and makes your background appear further away on video.
- Camera placement: Set your camera at eye level directly in front of you. Looking slightly up or straight ahead feels the most natural and confident on screen.
- Microphone position: Bring your mic in from the side on a boom arm, just outside the camera frame. Never place it directly between you and the camera; it blocks your face and looks messy.
- Key light angle: Position your key light slightly to the left or right of your camera. Keep it at face height or just slightly above for even, flattering illumination.
- Background distance: Leave at least 3 to 4 feet between you and your background wall. This physical separation creates natural depth of field and stops the background from looking flat behind you.
Two-Person Video Podcast Setup (Small Room)
Getting two people into a small room without it looking cramped takes a bit of thought. Below is the layout that works best.
- Room arrangement: Use either an L-shaped or a facing arrangement. L-shaped setups work better in very tight rooms because both hosts share one corner and the gear stays compact.
- Facing setup: In a facing arrangement, both hosts sit across from each other with the camera positioned between them. This needs a slightly wider space but looks great on video.
- Microphone setup: Each person needs their own microphone on a boom arm. Before recording, check that both boom arms can extend and rotate freely without colliding with each other.
- Lighting: Use two small key lights, one for each host. Position them on opposite sides of the setup to light each face separately and avoid shadows crossing over.
- Camera setup: A two-camera setup works best for a video podcast setup with multiple people. One wide shot captures both hosts together. Individual close-up cameras give you clean cuts during editing.
Step 5 — Cable Management in Small Rooms
A messy cable situation in a small room looks terrible on camera. It also becomes a safety hazard when people are moving around.
Start by measuring your cable runs before buying cables. Use the shortest cable length that reaches comfortably without strain.
Use cable clips or raceways along the back edge of your desk. Route all cables to one side and down the same cable path.
Velcro ties work better than zip ties for podcast setups. You often rearrange gear, and velcro ties allow quick adjustments without cutting.
A small cable box under your desk hides your power strip and excess cable length. This instantly cleans up the visual in your background.
For a wireless approach, a Bluetooth headset and a USB mic reduce cable count significantly. This works well for a simple podcast setup on a budget where simplicity matters more than maximum audio control.
Step 6 — Background Design for Small Room Video
Your background communicates who you are before you say a single word. Even in a small room, you can create a compelling visual backdrop. Professional creators worldwide rely on these exact podcast room ideas for small spaces. They are also easy to change when you want a fresh look. Here are the design choices that work best.
- Use a clean, neutral wall as your base. Off-white or light grey works well on camera and does not distract viewers.
- A styled bookshelf with books, plants, and a few objects adds personality without clutter. Keep it balanced and not too busy.
- Avoid plain white walls directly behind you. They look sterile and cause exposure issues with your camera’s auto settings.
- Add a small LED strip light behind your desk or shelf. Bias lighting adds depth and a subtle studio feel instantly.
- A dark-painted wall creates a sleek, professional look. Deep navy, charcoal grey, or forest green are popular choices.
- Keep your background consistent across episodes. Viewers connect your visual space with your brand over time.
- If you cannot paint your walls, use a fabric backdrop or vinyl roll. Both are portable, affordable, and camera-ready.
Conclusion
A small room is not a limitation. It is actually a fantastic starting point for video podcasting when set up correctly. You now have a complete roadmap for building a functional and professional-looking small room video podcast setup. From picking the right room to treating acoustics, selecting compact gear, managing cables, and designing your background every step connects.
The key is to start simple. Get your acoustics right first. Then build your gear list gradually. A solid home podcast studio does not happen overnight, but every small improvement makes a real difference to your recordings.
If you want to skip the setup stress entirely and record in a fully equipped, professionally treated studio, Delenzo Studio in Gulberg, Lahore is ready for you. With soundproof rooms, Sony A7III cameras, Rode Caster Pro II mixers, professional lighting, and an expert in-house team, everything is already set up.
All you need to bring is your ideas and your voice. We take care of everything else.
Not ready to build your own setup yet? Explore our complete Podcast Recording Studio Setup in Pakistan and see exactly how a professional space should look and feel.
Frequently Asked Questions
Yes, absolutely. A small room can produce professional-quality video podcast content. Treat your walls with acoustic foam, use a dynamic microphone, add a compact key light, and position your camera at eye level. The right setup matters far more than room size.
A dynamic microphone is the best choice for small, untreated rooms. It rejects background noise and room reflections naturally. The Audio-Technica AT2020 and AT2040 are top picks. Both deliver warm, clear audio even when your acoustic treatment is minimal or incomplete.
Add a thick rug, heavy curtains, and acoustic foam panels on side walls. Cover hard, reflective surfaces like bare walls, hardwood floors, and glass windows with soft materials. Place a bookshelf behind you to scatter sound. Soft surfaces absorb reflections and reduce echo without expensive construction or permanent room changes.
A compact mirrorless camera works best in small rooms. The Sony ZV-E10 and Sony A7III are popular choices. Both perform well in low light and fit easily on a small desk arm. A slightly wider lens helps frame your shot without needing extra distance from the camera.
Setting up a two-person video podcast in a small room requires an L-shaped or facing arrangement to maximize space. Place a dynamic microphone on a boom arm for each host. Set up one wide shot and one close-up camera angle for clean editing cuts. Control room acoustics and use editing software to sync and polish your footage.