
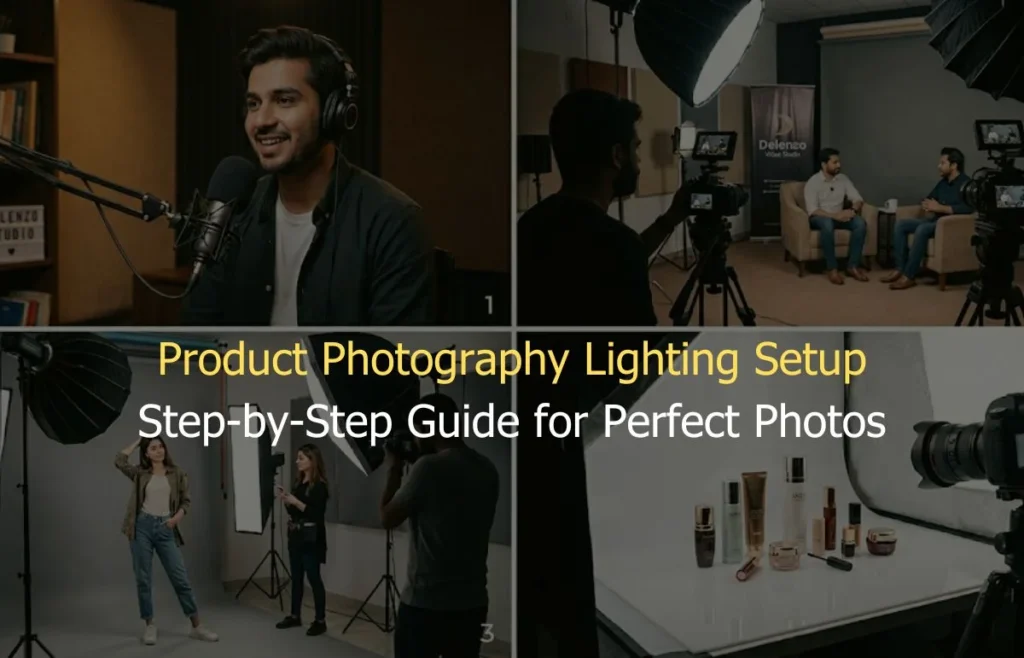
A proper product photography lighting setup is the single most important factor in creating images that actually sell. Every seller believes a high-end camera is the secret to great product photos. But professional photographers know the truth: light is the most critical element in every shot. Even the best camera cannot fix a poorly lit scene. Lighting shapes how your product looks, feels, and sells. It transforms flat, lifeless images into three-dimensional experiences that build buyer trust instantly. In fact, studies show that high-quality product images can increase conversions significantly.
The good news is that professional lighting doesn’t require a Hollywood budget. It requires understanding how light behaves, which equipment to use, and how to position everything correctly. Whether you’re shooting for an ecommerce store, a brand campaign, or a social media feed, this guide covers every step in plain, practical language. By the end, you’ll know exactly how to light your products and where in Lahore to get it done professionally.
What Is Product Photography Lighting?
Product photography lighting is the deliberate use of light sources, modifiers, and reflectors to illuminate a product in a way that makes it look its absolute best on camera. Unlike natural light, which shifts throughout the day, artificial studio lighting gives you full, repeatable control over every shot.
Good lighting reveals texture, shape, colour accuracy, and surface detail. It eliminates unwanted shadows and reduces glare on reflective surfaces. It also creates a consistent visual style across an entire product catalogue which is essential for brand credibility and ecommerce conversion.
There are three core light positions in product photography: the key light (your main source), the fill light (which softens shadows), and the background light (which separates the product from its backdrop). Understanding how these three work together is the foundation of every professional product photography lighting setup.
Essential Equipment for Product Photography Lighting
Before you shoot a single frame, your equipment choices define the quality ceiling of your work. The right gear makes lighting consistent, controllable, and repeatable. To begin with, here’s a breakdown of the core equipment every photographer needs for a solid lighting setup for product photography.
Softboxes and Continuous Lights
Softboxes are the most widely used light modifiers in product photography. They diffuse harsh light from a strobe or continuous LED source into a soft, even spread that wraps around your product naturally. The result is smooth gradients, reduced hard shadows, and accurate colour rendering.
Continuous LED lights like the Aputure 120D or Amaran series are ideal for beginners. Because the light is always on, you can see exactly how it falls on your product in real time. This makes positioning far more intuitive than using strobe lights, which only fire during the actual exposure. For most ecommerce and product work, a 60x60cm or 90x90cm softbox delivers the most versatile results.
Lightboxes and Reflectors
A lightbox also called a shooting tent is a self-contained, collapsible box lined with white diffusion material. You place small products inside it, and light enters from all sides simultaneously. The result is virtually shadow-free, evenly lit imagery perfect for jewellery, cosmetics, and small packaged goods.
Reflectors serve a different but equally important purpose. For example, rather than adding a new light source, a reflector bounces existing light back onto the shadow side of your product. A simple white foam board works just as effectively as expensive reflector panels. Furthermore, using a reflector reduces harsh contrast and fills in dark areas without the complexity of adding a second powered light to your setup.
Backgrounds and Shooting Surfaces
Your background is not a neutral decision; it actively affects how your product reads on camera. White backgrounds are the ecommerce standard. They’re clean, distraction-free, and meet the image requirements of Amazon, Daraz, and most major platforms.
However, lifestyle and brand photography often benefit from textured, tonal, or coloured backgrounds. Matte paper sweeps, acrylic shooting boards, and fabric backdrops each create a different aesthetic. Additionally, your shooting surface, the table or platform your product sits on should complement rather than compete with the product itself. Marble-effect boards, wooden surfaces, and matte white acrylic are all widely used by professional photographers.
Step-by-Step Product Photography Lighting Setup
A consistent, repeatable process is what separates professional photographers from beginners. In particular, follow these four steps every time you shoot and your product photography lighting setup will deliver reliable, high-quality results from the very first frame.
- Choose the Right Background: Start by placing your product on a clean, appropriate background. White seamless paper or a white acrylic board works for most ecommerce needs. Make sure the surface is clean, crease-free, and large enough to fill your entire frame without edges showing.
- Position Your Main Light: Place your key light at a 45-degree angle to the product either to the left or right, slightly above the shooting plane. This angle creates natural-looking shadows that give the product dimension and depth. Start with the light about 60 to 90cm away from the product and adjust from there.
- Add Fill Light or Reflector: On the opposite side of your key light, place a white reflector or a second, dimmer light source. This fills in the shadows created by your key light without eliminating them entirely. Therefore, your product retains shape and dimension while avoiding harsh, distracting dark areas.
- Adjust Camera Settings: Set your aperture between f/8 and f/11 for maximum sharpness across the product. Use ISO 100 to minimise digital noise. Set your shutter speed to match your light source — 1/125s or slower for continuous lights. Use a tripod for every shot to eliminate camera shake entirely.
One-Light vs Three-Light Product Photography Setup
Choosing the right number of lights depends on your product type, budget, and the look you’re after. Here’s a clear comparison to help you decide which product photography setup suits your needs best.
| Factor | One-Light Setup | Three-Light Setup |
| Best For | Simple products, flat lays, beginners | Complex products, full catalogue shoots |
| Shadow Control | Limited — reflectors needed | Full control over all shadow areas |
| Setup Time | 5–10 minutes | 20–30 minutes |
| Equipment Cost | Low — one light and modifiers | Higher — three lights, stands, modifiers |
| Background Separation | Achieved with angling | Dedicated background light available |
| Consistency | Good for simple products | Excellent for multi-product catalogues |
| Skill Required | Beginner-friendly | Intermediate to advanced |
| Ideal Products | Cosmetics, books, flat items | Electronics, apparel, reflective goods |
Product Photography Lighting Setup for Different Products
Different products have very different lighting needs. What works beautifully for a bottle of perfume can completely fail for a pair of earrings. Understanding these differences is what allows professional photographers to adapt their approach for every shoot. Now, let’s explore how your Photo Studio lighting setup should shift with each type of product.
Small Products (Jewelry, Cosmetics)
Small products require close, controlled, and diffused light. Because of their size, any harsh shadow appears disproportionately large in the final image. A lightbox is the most effective tool here as it wraps light around the product from multiple angles simultaneously. For jewellery specifically, a macro lens paired with a ring light or twin-head macro flash reveals intricate detail and metallic sheen without creating blown-out hot spots. Additionally, a clean white or black acrylic shooting surface adds a premium feel that directly supports higher perceived product value in the buyer’s mind.
Medium Products (Electronics, Apparel)
Medium-sized products like smartphones, laptops, and folded clothing benefit from a two-light setup. A large softbox as the key light creates even, flattering illumination across the product surface. A fill light or reflector on the opposite side controls shadow depth. For electronics, colour accuracy is critical. Use daylight-balanced LEDs at 5500K to render screens, bezels, and logos with true-to-life precision. For apparel, a slightly elevated key light at around 60 degrees reveals fabric texture and drape, both of which are key purchase drivers for clothing buyers online.
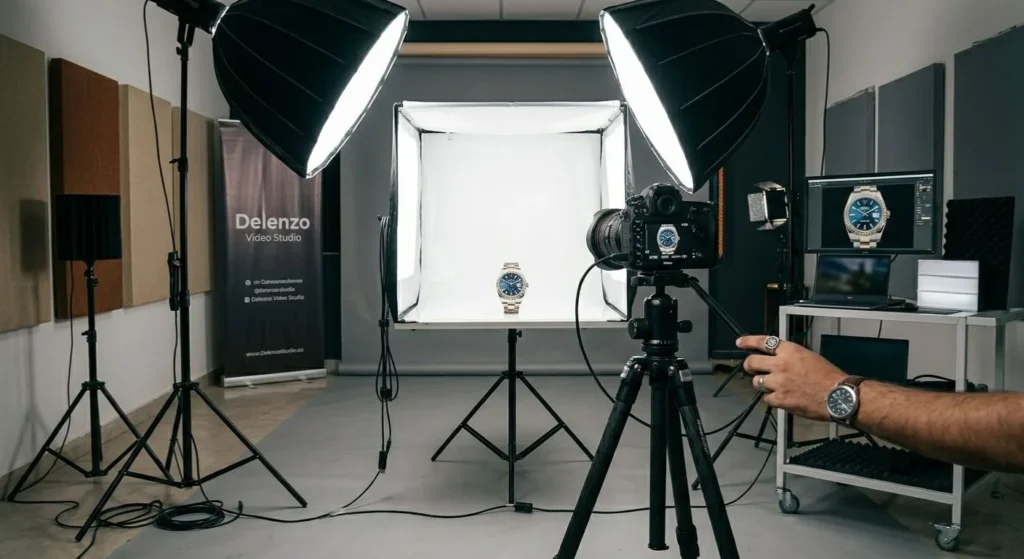
Reflective Products (Glass, Metal)
Reflective surfaces are the most technically challenging category in studio lighting for product photography. Glass bottles, metal watches, and chrome hardware all mirror the environment around them. Any light source, stand, or camera positioned incorrectly will appear as a reflection in the shot.
The solution is a light tent or a large, white curved surface surrounding the product on all sides. This creates a clean, white reflected environment with no visible objects. Furthermore, shooting at a slight angle rather than head-on reduces unwanted direct reflections significantly. Polarising filters on both the light source and the camera lens are also highly effective for cutting glare on glass and liquid-filled bottles.
Common Product Photography Lighting Mistakes
Even experienced photographers make these errors under time pressure. However, knowing them in advance means you can avoid them entirely. To clarify, the following are the most common mistakes that hurt product photography results and how to fix each one.
- Using only one harsh light source: Hard, undiffused light creates deep shadows and blows out highlights. Always use a softbox or diffusion panel.
- Ignoring the background: A creased, dirty, or poorly lit background distracts from the product. Clean and light it separately for best results.
- Mixing light colour temperatures: Combining daylight (5500K) and tungsten (3200K) sources creates unappealing colour casts that are hard to correct in editing.
- Shooting with a high ISO: Settings with ISO above 400 introduce visible grain. Always use ISO 100 with a tripod in controlled studio conditions.
- Placing the key light too close: Proximity increases intensity and creates hot spots on product surfaces. Move the light back and increase exposure time instead.
- Not using a tripod: Even minor camera movement blurs fine product detail. A tripod is non-negotiable for sharp, professional ecommerce images.
- Skipping test shots: Always shoot a test frame, review it at 100% zoom, and adjust lighting before committing to a full shoot.
Professional Product Photography at Delenzo Studio in Lahore
Getting a professional product photography lighting setup right at home is challenging. It requires expensive equipment, technical knowledge, and a controlled space. For many brands, this investment isn’t practical. Trusted by ecommerce brands and photographers across Lahore, our studio delivers consistent, high-quality results without trial and error.
Delenzo Studio in Gulberg is a dedicated product photography studio, fully equipped for ecommerce, brand, and catalogue shoots. You get professional Aputure and Amaran lighting, seamless backdrops, shooting surfaces, and high-end cameras all ready before your session. The team understands ecommerce product photography Lahore requirements for platforms like Daraz and brand campaigns alike. With built-in editing services and flexible booking, you leave with polished, ready-to-use images. If you want reliable, professional product photography in Lahore, this is the most efficient solution.
Frequently Asked Questions
How do you set up lighting for a white background?
To create a clean white background, use two lights aimed at the backdrop and one main light for your product. Keep the background lights slightly brighter than the subject. This removes shadows and creates a pure white effect without overexposing your product details or colors.
How do you set up lighting for product photography?
Start with a key light positioned at a 45-degree angle to your product. Add a fill light or reflector on the opposite side to soften shadows. Use diffusers to control harsh light. This simple setup creates balanced, professional product photos with clear details and natural depth.
How to avoid glare on shiny products?
To avoid glare on reflective or shiny products, use diffused lighting instead of direct light. Position lights at angles rather than straight on. A light tent or softbox helps spread light evenly. Adjust camera angles slightly until reflections are minimized and the product surface looks clean and controlled.
Can I shoot product photos with one light?
Yes, you can shoot product photos with one light by using a reflector or white surface to bounce light back onto the subject. Place the light at a 45-degree angle and control shadows with reflectors. This setup works well for beginners and small product photography setups.
One light vs three light setup: which is better?
A one-light setup is simple, affordable, and great for beginners. A three-light setup offers more control over shadows, highlights, and background lighting. It is better for professional product photography where consistency and depth matter. Choose based on your budget, experience, and desired image quality.
What lighting is best for product photography?
Soft, diffused lighting is best for product photography. Softboxes, LED panels, or natural window light with diffusion create even illumination without harsh shadows. Consistent lighting ensures accurate colors and textures. Professional setups often use controlled studio lights for repeatable, high-quality product images across all shoots.

